2024-07-11
Create a Compose Multiplatform Library Project

Series: Creating A Compose Multiplatform UI Library
- Create a Compose Multiplatform Library Project
- Making a Rectangular Segmented Display
- Improving the Look of the Segmented Display
- Shearing the Segmented Display
- Preparing for Release
- Releasing to Maven Central
Table of Contents
• Create a compose multiplatform library project
• TLDR
• Generating the project
• Download
• Git init
• Open in Android Studio
• Project Tour
• Gradle settings file
• Root Gradle build file
• Your application module
• Dependency definitions
• Dependency declaration
• Launching app on each target
• WASM
• Desktop
• Android
• iOS
• Modifying the project
• Copying the composeApp module
• Including the segmented-display module
• Making segmented-display a library module
• Updating the JVM target name
• Updating the iOS targets
• Removing unnecessary dependencies
• Removing the compose.desktop block
• Summary of converting the application module into a library module
• Changing some Library Code
• Removing all the old code
• Add a sample Composable
• Making sure your project compiles
• Set the inter-project dependency in the composeApp module
• Use the SampleComposable function in the composeApp module
• Showing the Sample Composable
• Conclusion
Create a compose multiplatform library project
This is the first article in a series of articles about creating a Compose Multiplatform UI Library for Android, Desktop, iOS, and Web. In this article, we'll create a new project using the Kotlin Multiplatform Wizard and then modify it such that it is the most convenient for developing a UI library. Along the way, I will explain the steps we're taking and provide a few checkpoints where you should stop and test. The goal of this article series is to be instructive--not necessarily to demonstrate how real-world projects are developed. Feel free to skip over anything you already know.
By the end of the last article in this series, you'll have . . .
- A completed library project that renders a 7-segment display in Compose Multiplatform for Android, Desktop, iOS, and Web targets.
- A library binary deployed to Maven Central, and this library will be usable in any Compose Multiplatform project with matching targets via adding it as a dependency.
- A professional-looking reference documentation page available on the internet, hosted for free.
- A sample application that demonstrates the use of the library on Android, Desktop, iOS, and Web targets.
- A lot of fun. I mean--it's fun for me. I hope it's fun for you.
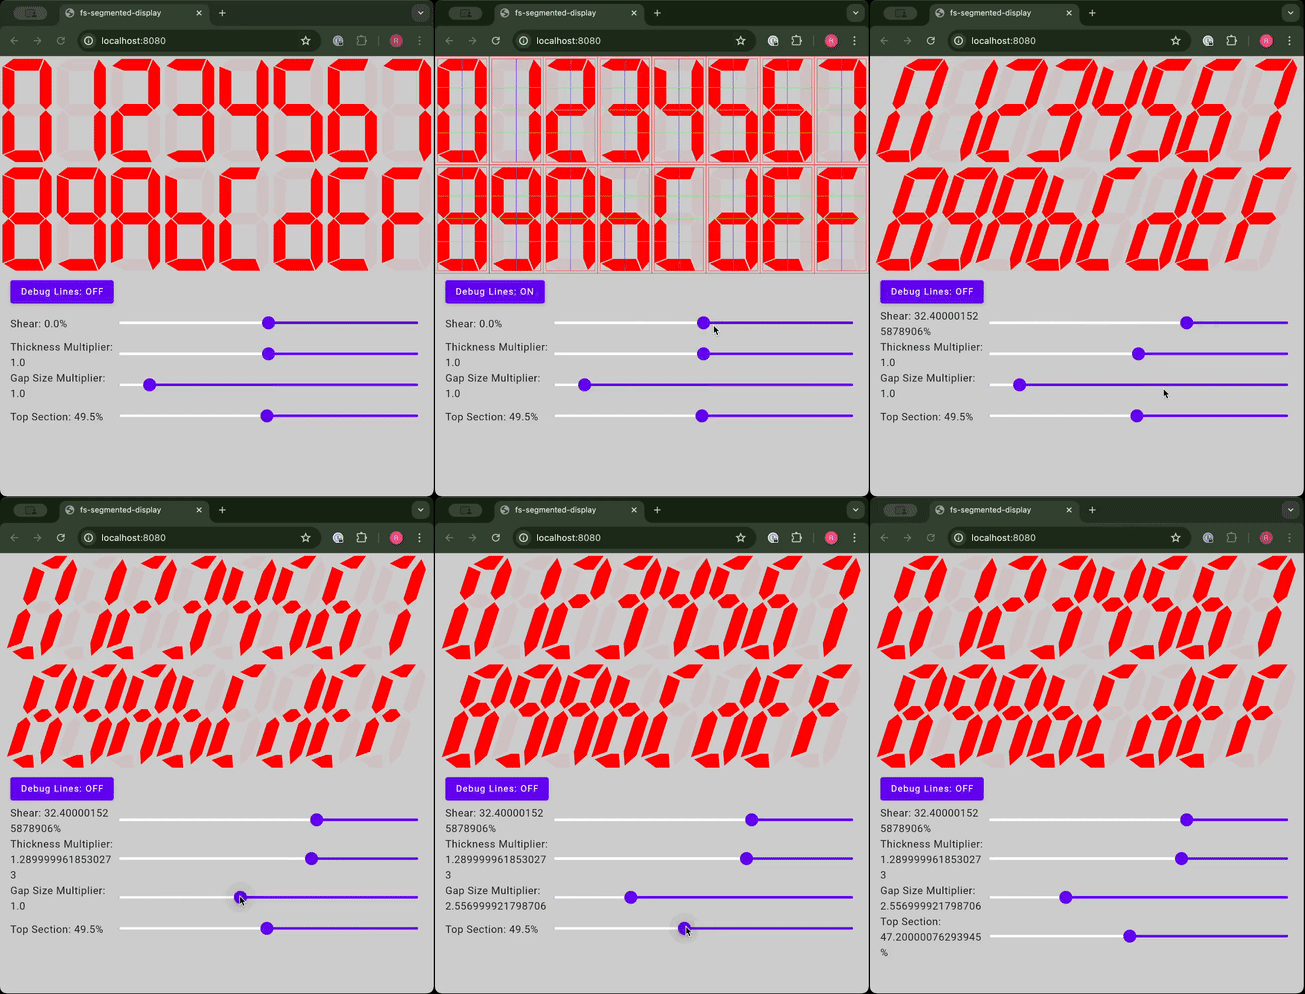
In the end, your sample application demonstrating your library code will look something this:
By the end of this article, you'll learn:
- How to set up a Kotlin Multiplatform project for both an application and a library
- How to place dependencies between subprojects of a Gradle multiproject build
- Some basics of Gradle configuration for Kotlin Multiplatform projects
This is nothing revolutionary, but these are the foundations. The cool stuff will come later.
If you're not using a Mac as your development computer, then you can just comment out or skip everything that says you should do something for iOS. Presently, non-Mac devices cannot be used for Compose iOS.
I'm assuming that you have JDK 11 or higher installed and configured on your system, you have Android Studio installed, you know how to install plugins for Android Studio, and you have git installed and know some basics. It's fine if you don't have these things, but, you'll have to learn while doing (which is what basically all software engineers do all the time anyway).
TLDR
- Use the Kotlin Multiplatform Wizard to create a new project, expand it, and open it in Android Studio
- Copy the composeApp module and give it a name (I'll use
segmented-display) - Include the
segmented-displaymodule - Exchange the android application plugin for the android library plugin
- Remove application dependencies and code from the
segmented-displaymodule - Create a sample composable function
- Set the composeApp module dependent upon the new module and use the sample composable function in the app module
Generating the project
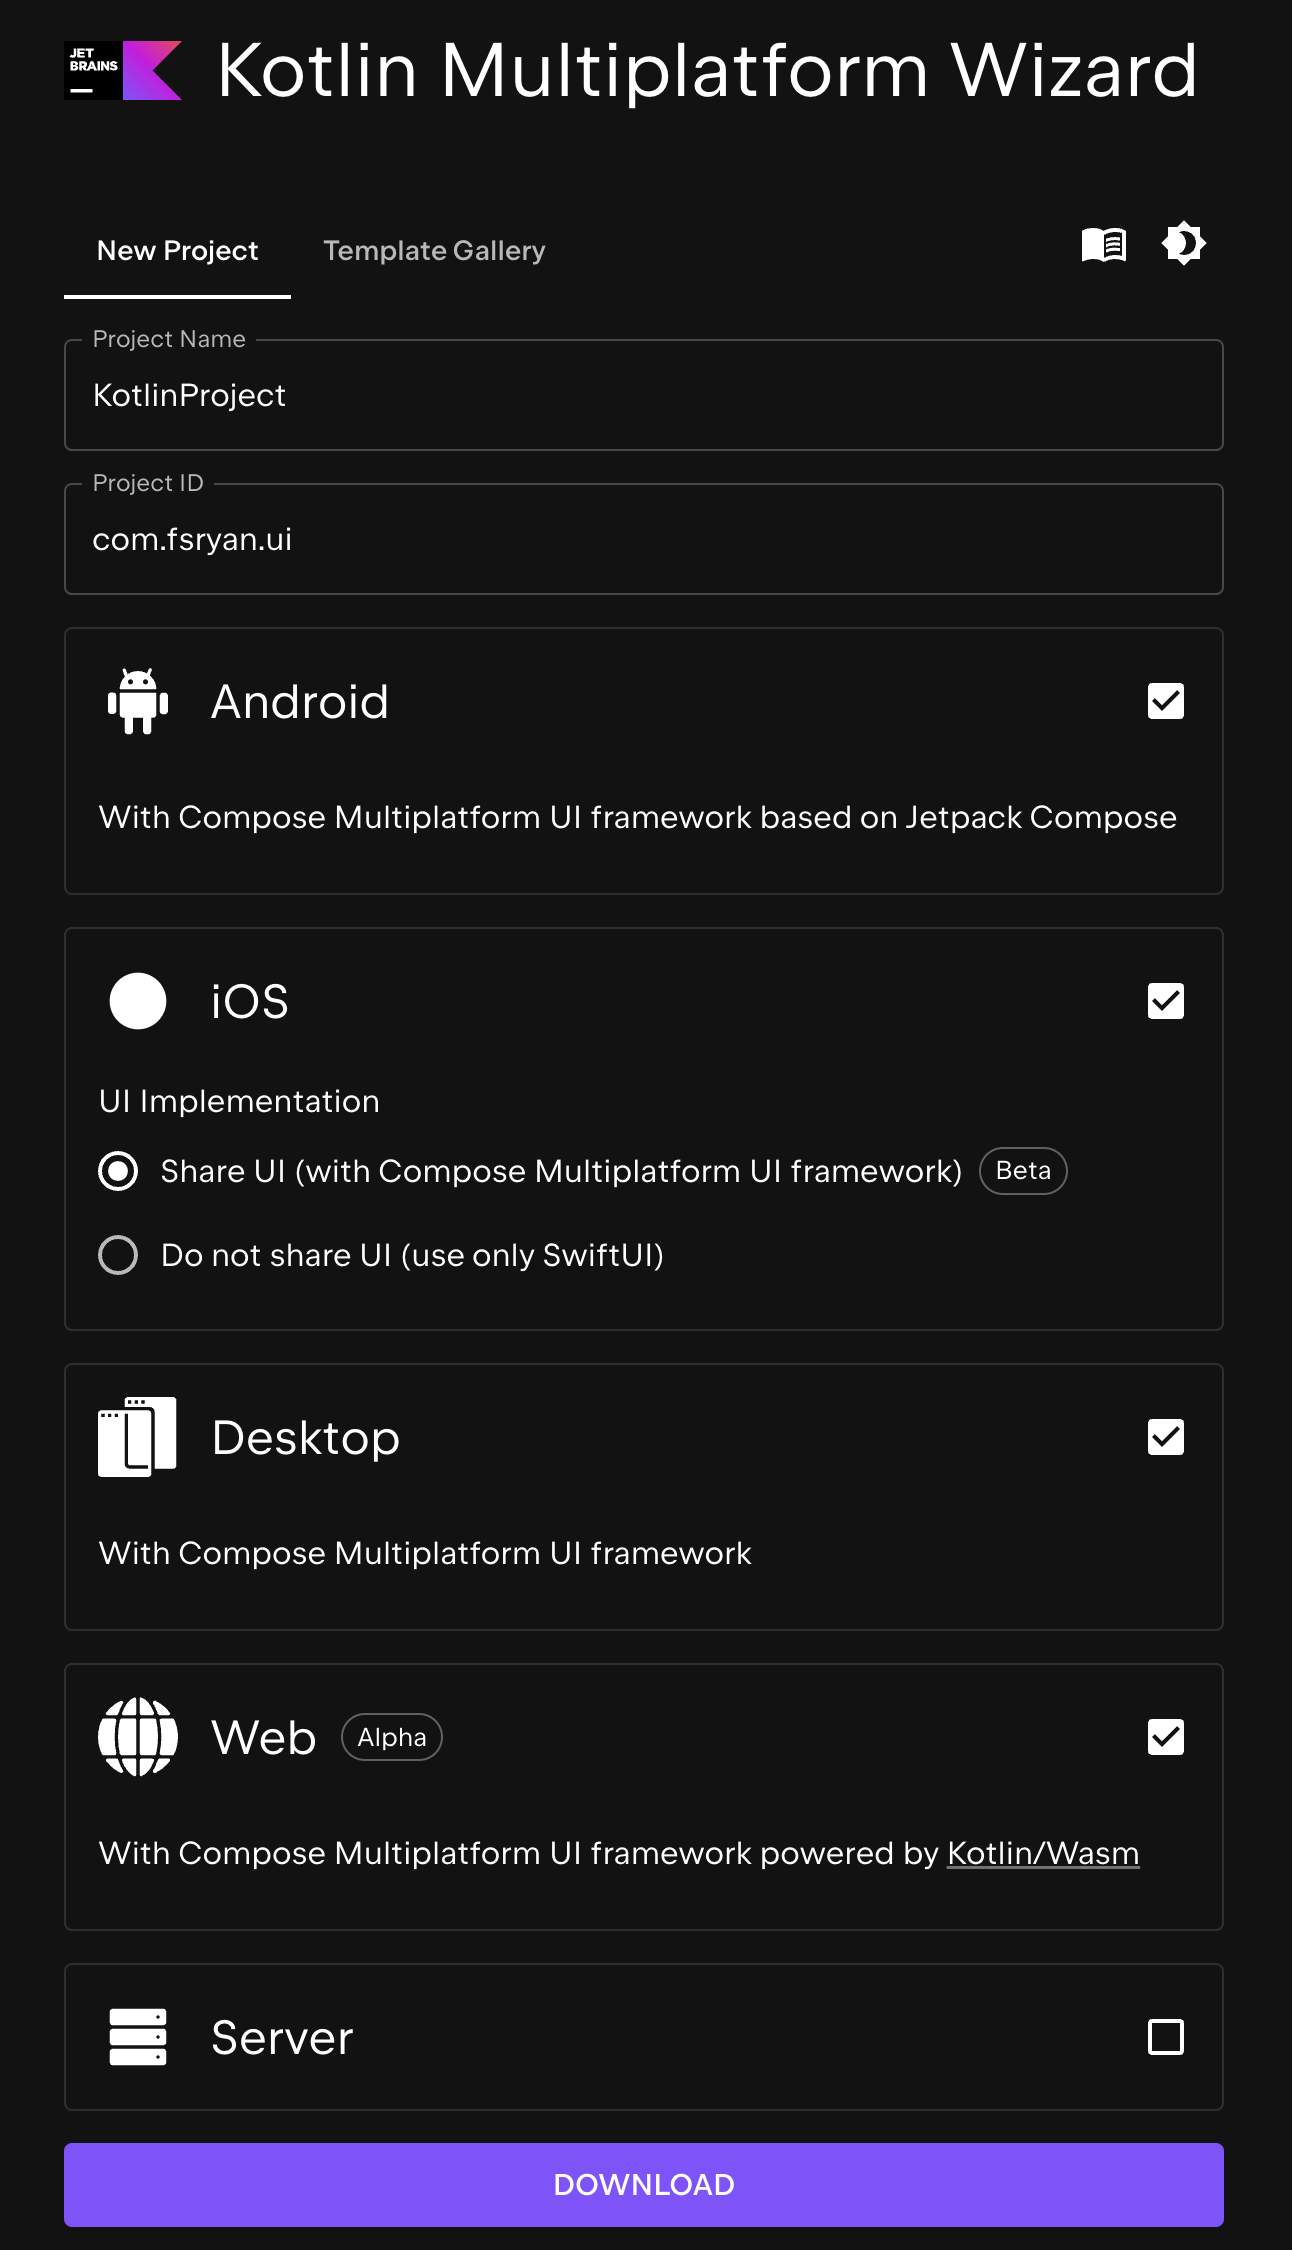
The folks at JetBrains have a very handy Kotlin Multiplatform Wizard that will help you create a new project. Although there is an additional template for a multiplatform library, it's better to not use it. Instead, generate your project via the "New Project" tab, ensuring you have checked the Android, iOS, Desktop, and Web checkboxes and not the Server checkbox.
The Project ID you input is important. You'll need it later. I used com.fsryan.ui for this project, but you should use something unique to you.
Download
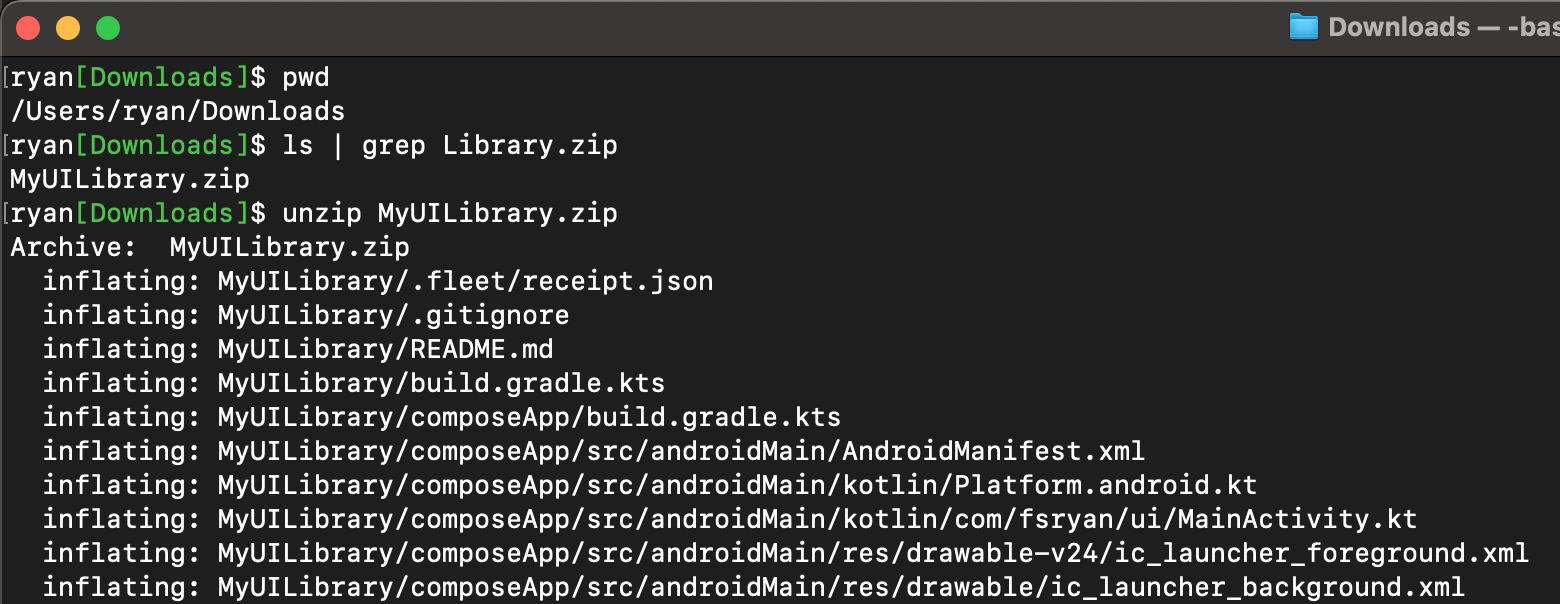
When you download the project, a zip file will go into your configured download directory. Feel free to move this file to whatever directory you wish. For this exmaple, I'm going to just directly unzip into my Downloads directory, but you probably shouldn't do that.
Git init
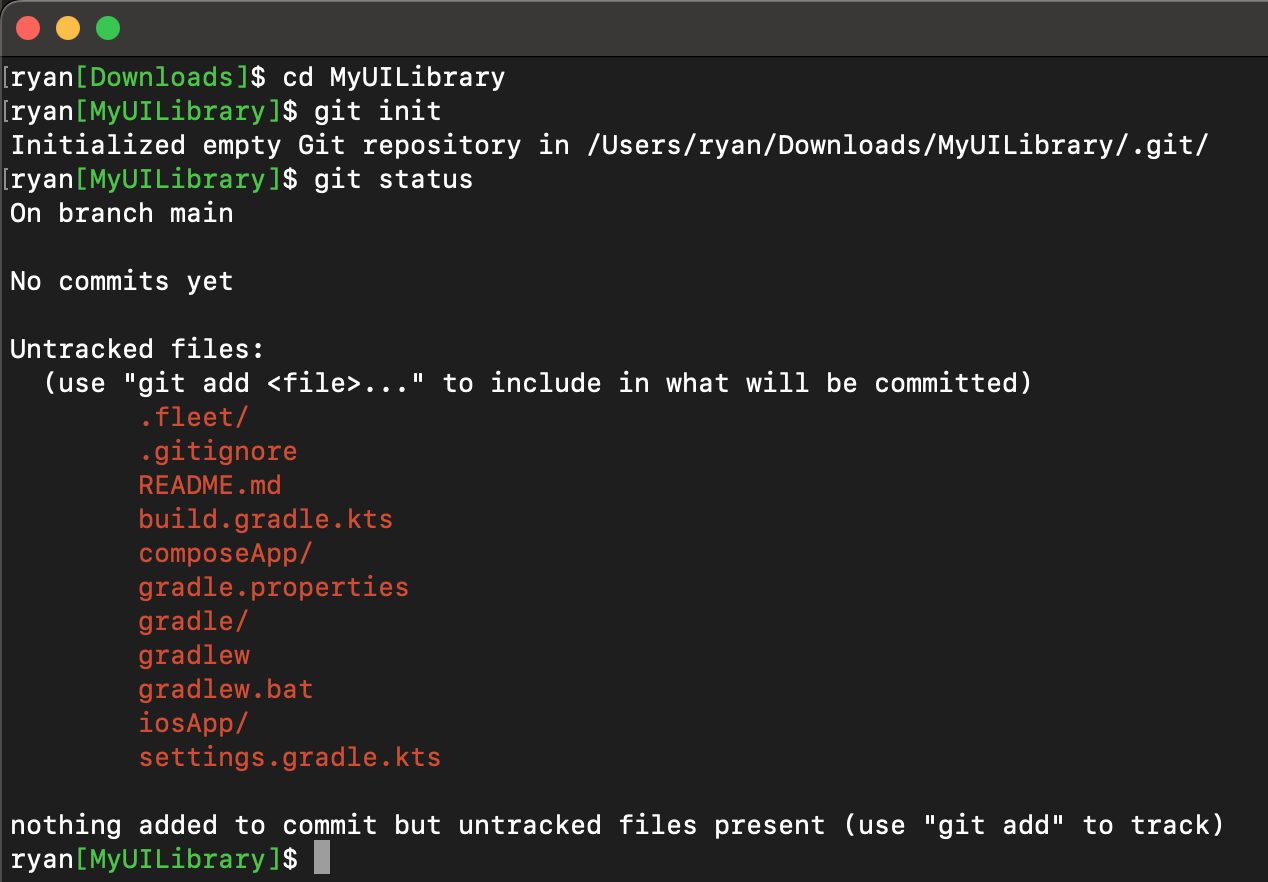
A great first step when starting out a project is to initialize a git repo. If you wish to use a different version control system, feel free to use it. I use git.
Open in Android Studio
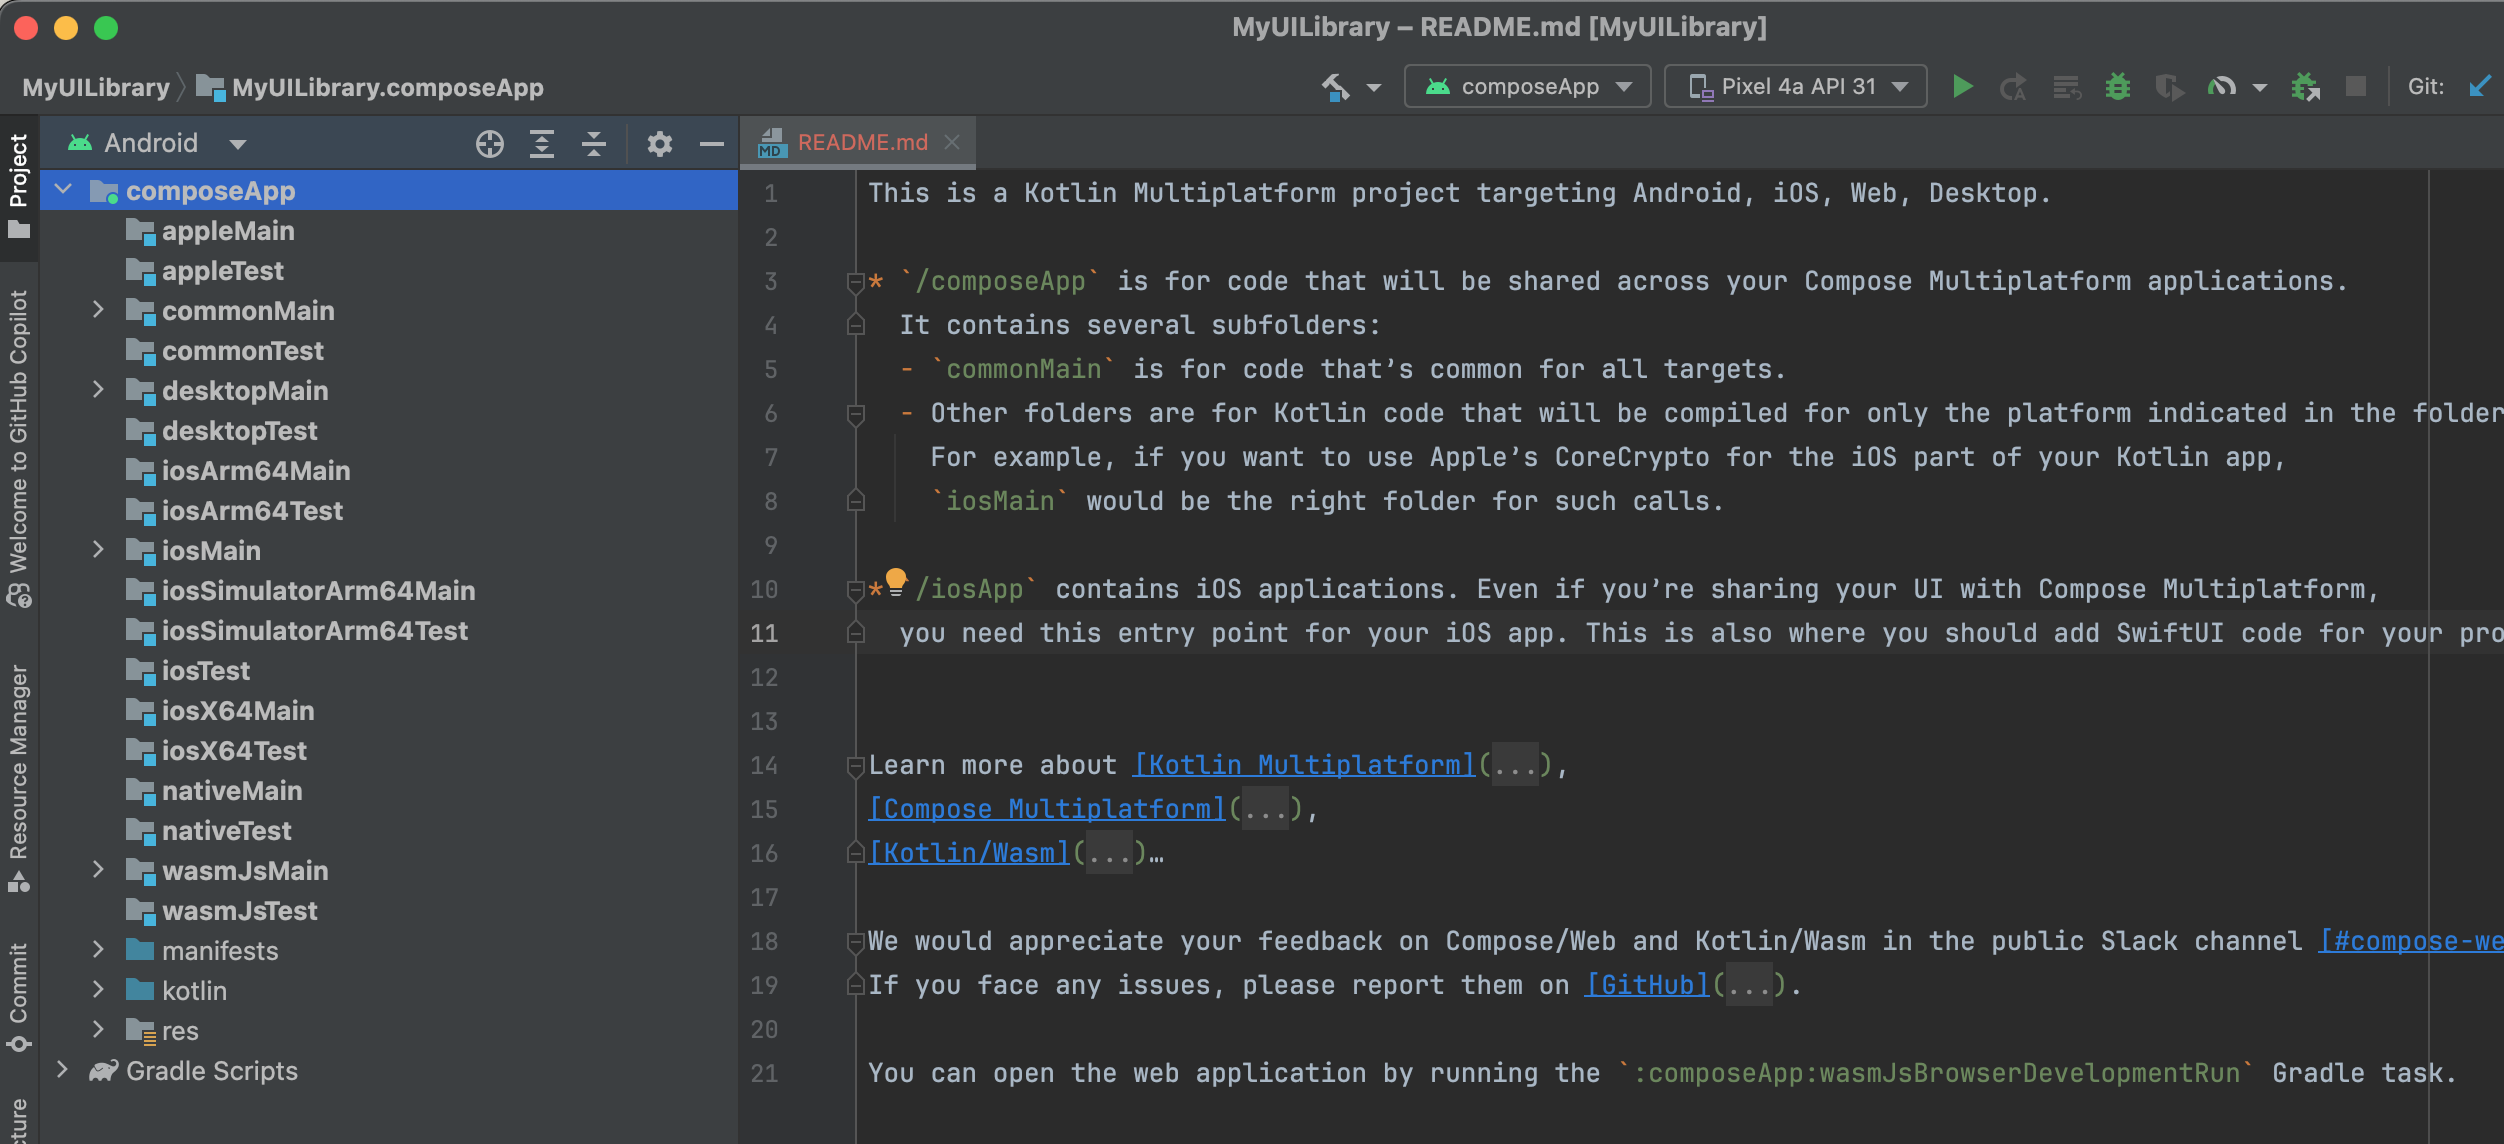
Open the project in Android Studio. You'll see a project structure like the following:
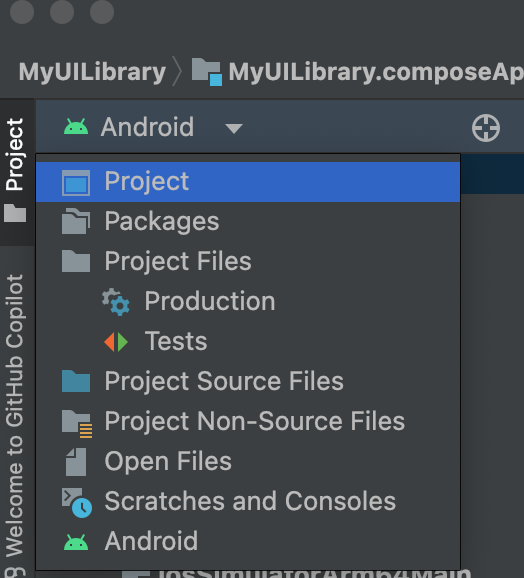
I find the default project panel view to not be worth using. I always switch from the android project panel view to "Project":
Project Tour
I may go into greater detail in the future about how Gradle works and how to understand gradle projects in general, but for brevity's sake, I'll just go over the highlights here.
By way of introduction, I'll just say that Gradle is a mature, feature-rich, and extensible build system that is used nearly universally to build Android apps and is extremely common in Java and Kotlin projects (but it is not limited to those languages and platforms). If you don't know gradle, then it would be wise to learn about it. However, the most important thing I can explain to new users is that in a typical project, there are two applications:
- The application you're building
- The application that builds your project (in this case, gradle)
Whenever you mess with a gradle script, it is important to know the scope of your changes. Does your change affect how your application is built, or how it runs? There is, of course, more nuance, but if you can answer that question, as you make changes, you're 90% of the way to success.
Gradle settings file
You may have noticed the gradle settings file:
rootProject.name = "MyUILibrary"
enableFeaturePreview("TYPESAFE_PROJECT_ACCESSORS")

pluginManagement {
    repositories {
        google {
            mavenContent {
                includeGroupAndSubgroups("androidx")
                includeGroupAndSubgroups("com.android")
                includeGroupAndSubgroups("com.google")
            }
        }
        mavenCentral()
        gradlePluginPortal()
    }
}

dependencyResolutionManagement {
    repositories {
        google {
            mavenContent {
                includeGroupAndSubgroups("androidx")
                includeGroupAndSubgroups("com.android")
                includeGroupAndSubgroups("com.google")
            }
        }
        mavenCentral()
    }
}

include(":composeApp")
The lines I'll call out here are
pluginManagement {}-> Configures the repositories that Gradle will use to supply plugins to the program that builds your project. This does not directly have an effect on how your project behaves, rather, it configures things like what repositories to look at when Gradle attempts to download plugins referenced in thebuild.gradle.ktsfiles.dependencyResolutionManagement {}-> Configures the repositories Gradle will use to supply dependencies to your project. When you see that a library dependency that you want to add to your project is not found, this is one of the areas to check.- and
include(":composeApp")-> The include(":composeApp") line is where you define the gradle modules that are part of your project. In a multi-project build (as is this one, with a root project and a single subproject), you must include any subproject, or gradle will not see it.
Root Gradle build file
The root gradle build file is a place where you can define common configuration for subprojects and avoid redoing the same work.
plugins {
    // this is necessary to avoid the plugins to be loaded multiple times
    // in each subproject's classloader
    alias(libs.plugins.androidApplication) apply false
    alias(libs.plugins.androidLibrary) apply false
    alias(libs.plugins.jetbrainsCompose) apply false
    alias(libs.plugins.compose.compiler) apply false
    alias(libs.plugins.kotlinMultiplatform) apply false
}
I'll explain the alias(libs.plugins.x) code later when we talk about dependency definitions.
There is much more that may be done in the root project's build.gradle.kts file, but it won't be necessary for this project.
Your application module
The composeApp directory contains your application module, the build script for the project, the source code for each target. The composeApp/build.gradle.kts file is where we find some very important bits of build configuration.
Target definitions
Within the kotlin {} block, you'll see the following:
kotlin {
    @OptIn(ExperimentalWasmDsl::class)
    wasmJs {
        /* ... */
        binaries.executable()
    }
    /* ... */
}
This says that we want a WASM JS target. Also notice binaries.executable(). Because this will be our UI Library's demonstration application, we'll leave this as-is. It says to create an executable binary instead of a library. We'll get to the library when we modify the project.
kotlin {
    /* ... */
    androidTarget {
        @OptIn(ExperimentalKotlinGradlePluginApi::class)
        compilerOptions {
            jvmTarget.set(JvmTarget.JVM_11)
        }
    }
    /* ... */
}
This says that we want an Android target. The android application extension (Gradle extension) used to configure the Android application is later in the project.
kotlin {
    /* ... */
    jvm("desktop")
    /* ... */
}
This says that we want a desktop target. We will get to the specific desktop application configuration later.
kotlin {
    /* ... */
    listOf(
        iosX64(),
        iosArm64(),
        iosSimulatorArm64()
    ).forEach { iosTarget ->
        iosTarget.binaries.framework {
            baseName = "ComposeApp"
            isStatic = true
        }
    }
    /* ... */
}
This says that we want three iOS FRAMEWORK targets, each with a different hardware target. Why a library? Because your iOS project is actually defined in the iosApp directory. It's a bare-bones iOS application that takes care of the scaffolding necessary to show your compose views--nothing fancy.
Dependency definitions
A relatively recent addition to the Gradle ecosystem is the concept of a version catalog. The idea behind this is the same idea behind using constants in your application code. The toml file structure is great because gradle users (including me) often used to solve the same problem in many different ways. The .toml file facilitates a common structure to follow such that when you're looking at someone else's project, it's easier to navigate. I find that benefit outweighs the drawback of splitting definition and declaration of dependencies.
So if you want to see your how your project's dependencies are defined, look in the gradle/libs.versions.toml file. The template generator generated this for me (but if you're following this guide later, the versions, libraries and plugins may change):
[versions]
agp = "8.2.0"
android-compileSdk = "34"
android-minSdk = "24"
android-targetSdk = "34"
androidx-activityCompose = "1.9.0"
androidx-appcompat = "1.7.0"
androidx-constraintlayout = "2.1.4"
androidx-core-ktx = "1.13.1"
androidx-espresso-core = "3.6.0"
androidx-material = "1.12.0"
androidx-test-junit = "1.2.0"
compose-plugin = "1.6.11"
junit = "4.13.2"
kotlin = "2.0.0"

[libraries]
kotlin-test = { module = "org.jetbrains.kotlin:kotlin-test", version.ref = "kotlin" }
kotlin-test-junit = { module = "org.jetbrains.kotlin:kotlin-test-junit", version.ref = "kotlin" }
junit = { group = "junit", name = "junit", version.ref = "junit" }
androidx-core-ktx = { group = "androidx.core", name = "core-ktx", version.ref = "androidx-core-ktx" }
androidx-test-junit = { group = "androidx.test.ext", name = "junit", version.ref = "androidx-test-junit" }
androidx-espresso-core = { group = "androidx.test.espresso", name = "espresso-core", version.ref = "androidx-espresso-core" }
androidx-appcompat = { group = "androidx.appcompat", name = "appcompat", version.ref = "androidx-appcompat" }
androidx-material = { group = "com.google.android.material", name = "material", version.ref = "androidx-material" }
androidx-constraintlayout = { group = "androidx.constraintlayout", name = "constraintlayout", version.ref = "androidx-constraintlayout" }
androidx-activity-compose = { module = "androidx.activity:activity-compose", version.ref = "androidx-activityCompose" }

[plugins]
androidApplication = { id = "com.android.application", version.ref = "agp" }
androidLibrary = { id = "com.android.library", version.ref = "agp" }
jetbrainsCompose = { id = "org.jetbrains.compose", version.ref = "compose-plugin" }
compose-compiler = { id = "org.jetbrains.kotlin.plugin.compose", version.ref = "kotlin" }
kotlinMultiplatform = { id = "org.jetbrains.kotlin.multiplatform", version.ref = "kotlin" }
These definitions are REFERENCED in your gradle build scripts via the libs property. Want to reference a version? Use the generated libs.versions property. Want to reference the androidx-activity library dependency? Use the generated libs.androidx.activity property.
This takes me back to the alias(libs.plugins.x) code in the root gradle build script that I said I would explain. The alias function of the PluginDependenciesSpecScope class enables you to pass a Provider<PluginDependency>, which is exactly the class that gets generated for you by gradle that you can reference with libs.plugins.x.
Dependency declaration
It's pretty rare in practice to develop a library or application that has no dependencies other than the standard library that comes with the language used. Thus, it's pretty important to know how to properly declare dependencies.
Back in the composeApp/build.gradle.kts file, you'll see the following:
kotlin {
    /* ... */
    sourceSets {
        val desktopMain by getting

        androidMain.dependencies {
            implementation(compose.preview)
            implementation(libs.androidx.activity.compose)
        }
        commonMain.dependencies {
            implementation(compose.runtime)
            implementation(compose.foundation)
            implementation(compose.material)
            implementation(compose.ui)
            implementation(compose.components.resources)
            implementation(compose.components.uiToolingPreview)
        }
        desktopMain.dependencies {
            implementation(compose.desktop.currentOs)
        }
    }
    /* ... */
}
If you're used to Gradle but not used to Kotlin Multiplatform, then this will look slightly different than you're used to. The SourceSet you're used to working with on a Java project is not the same thing as the KotlinSourceSet provided by the Kotlin Multiplatform plugin. If you are familiar with Gradle for a Java project, then you will probably find the documentation to be useful. The following points are pertinent:
- The source sets enable you to configure the binary dependencies, source dependencies (as in--you can set up parent-child relationships between source sets in the interest of sharing code between targets), resources, and other aspects of what goes into one set of source code.
- Your aim should be, as much as possible to write code in
commonMainbecause it is the highest in the hierarchy of sources, and as presently configured, all other source sets depend upon it.commonMainis also the least flexible source set in that it cannot take advantage of any platform-specific code directly, and thus must occasionally delegate functionality to the target-specific code. This project is unlikely to need you to leverage this feature of Kotlin Multiplatform directly, but the mechanism for this is called "expect and actual declarations". - The name of each source set comes from how the target has been configured. Mostly, the default names will be used, but this project has an example of how to supply a custom name.
desktopMain, for example, is notjvmMainbecause the targetjvm("desktop")was configured above, having the default name (jvm) overridden. - There are other source sets that are not specifically listed here.
- If you start getting too fancy with source sets, setting up your own intermediate source sets that allow you to share 2 lines of code rather than copy them (as is tempting between Android and JVM source sets), you'll often create difficulties for yourself that are better avoided. It's best to stick with the well-trodden path.
Launching app on each target
At this point, it's a good idea to test that you can run each of the configured targets. In all cases, you should be able to click the button and an animation should show the Compose Multiplatform picture.
Should you encounter environment errors at this time, it's best to resolve them now. If you don't resolve them before we start making edits, then you may have difficulty determining whether you caused the issue or whether your dev environment had issues to begin with.
WASM
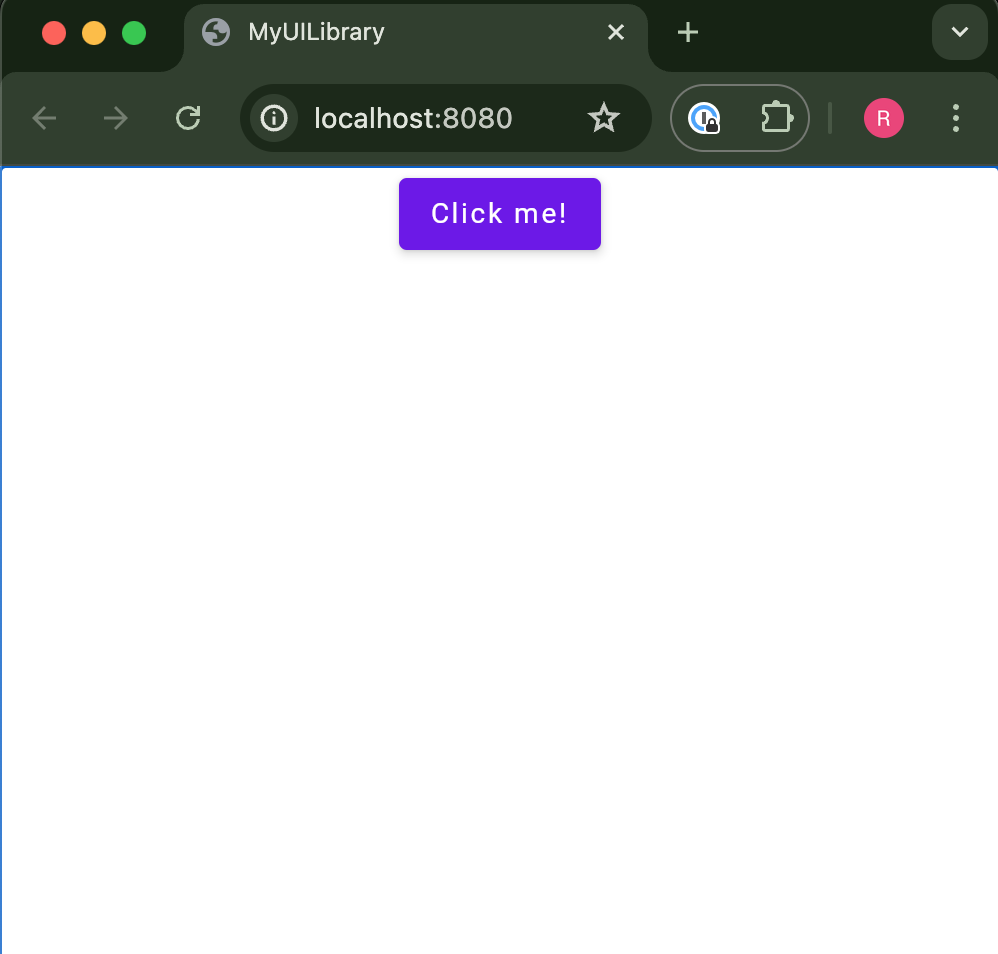
run ./gradlew :composeApp:wasmJsBrowserRun When it's finished building, you should see a browser window open with the application running. It will look like this:
Desktop
run ./gradlew :composeApp:desktopRun -DmainClass=MainKt
Android
If you used a different project ID than I did when using the Kotlin Multiplatform Wizard, you'll need to adjust the android command below with your project ID instead of com.fsryan.ui.
run ./gradlew :composeApp:installDebug && adb shell am start -n com.fsryan.ui/.MainActivity
iOS
Skip this if you're not running on a Mac. The following will not work for you.
It's a little more tricky to run the iOS application. First, you should check whether your environment is ready for kotlin multiplatform development:
ryan[MyUILibrary]$ kdoctor
Environment diagnose (to see all details, use -v option):
[✓] Operation System
[✓] Java
[✓] Android Studio
[✓] Xcode
[✓] CocoaPods

Conclusion:
  ✓ Your operation system is ready for Kotlin Multiplatform Mobile Development
If you don't have kdoctor, then you can use homebrew to install it:
ryan[MyUILibrary]$ brew install kdoctor
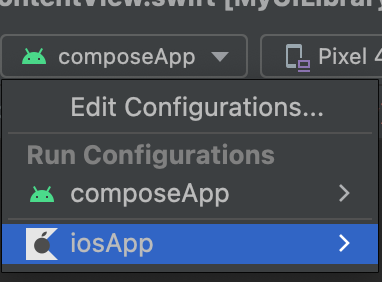
In order to run the app in the iOS simulator, it's just best at this time to use It's just best to use Android Studio plus the Kotlin Multiplatform plugin. If you don't have that Android Studio plugin installed, install it now. After you do that, select the iosApp run configuration
Modifying the project
Supposing you have the template app running and working, it's now time to modify your project to produce a UI Library. The goal of this article is to share as much knowledge as possible. There may be shorter paths to successfully creating a Kotlin Multiplatform library module (such as templates in the IDE), but we're going to instead just copy the composeApp module and modify it to be a library module. This will be the most instructive approach, if not the fastest.
Before you start making modifications, it's a good idea to make a git commit. I'm not going to remind about using git again because it's not really the point of the article.
Copying the composeApp module
There are two main ways to copy:
- Via the Android Studio UI, you can cmd+C, cmd+V the
composeAppdirectory and then rename the new directory tosegmented-display. - Via command line, navigate to this directory and run
cp -r composeApp segmented-display.
While this will copy files for you, your IDE won't see this new segmented-display directory as anything special, and neither will Gradle if you run Gradle from the command line. You'll need to modify settings.gradle.kts in order to have this new subproject recognized by Gradle.
Including the segmented-display module
In the settings.gradle.kts file, you'll see the following:
include(":composeApp")
This tells Gradle to include the composeApp module (as defined by the name of the directory) in the project. What's with the leading :? That's the Gradle path delimiter. This is exactly like a directory path delimiter (usually /). It enables Gradle to reference both subprojects and tasks of those subprojects unambiguously while enabling project nesting. So the : prefix just means, "from the root project."
So you'll need to add the following line:
include(":segmented-display")
At this point, if you refresh the Gradle project in Android studio, you should see that segmented-display directory changes to look like a Gradle subproject, you get nice syntax higlighting and code-completion features when editing files in this directory, etc.
Making segmented-display a library module
Right now, the segmented-display subproject is just a copy of composeApp. It has all the Gradle configuration for an application, and none of the configuration for a library module. Let's fix that.
In this section, we'll work entirely within the context of the segmented-display/build.gradle.kts file.
Updating the plugins
Presently, we have:
plugins {
    alias(libs.plugins.kotlinMultiplatform)
    alias(libs.plugins.androidApplication)
    alias(libs.plugins.jetbrainsCompose)
    alias(libs.plugins.compose.compiler)
}
For now, all we need to do is change the alias(libs.plugins.androidApplication) line to alias(libs.plugins.androidLibrary). The template, at the time I generated it, had the following line in gradle/libs.versions.toml:
androidLibrary = { id = "com.android.library", version.ref = "agp" }
If it's not there when you follow this guide, you'll need to add that.
Were you to perform a Gradle sync in Android studio now, you'll receve the following message:
e: file:///Users/your/directory/MyUILibrary/segmented-display/build.gradle.kts:86:9: Unresolved reference: applicationId
That's because the applicationId property is not defined for a library module. Looking to the android block, we have this:
android {
    /* ... */
    defaultConfig {
        applicationId = "com.fsryan.ui"
        minSdk = libs.versions.android.minSdk.get().toInt()
        targetSdk = libs.versions.android.targetSdk.get().toInt()
        versionCode = 1
        versionName = "1.0"
    }
    /* ... */
}
Remove the applicationId, versionCode, and versionName lines, as they are applicable to android applications--not libraries.
Updating the wasmJs target
Presently, we have:
kotlin {
    @OptIn(ExperimentalWasmDsl::class)
    wasmJs {
        moduleName = "composeApp"
        browser {
            commonWebpackConfig {
                outputFileName = "composeApp.js"
                devServer = (devServer ?: KotlinWebpackConfig.DevServer()).apply {
                    static = (static ?: mutableListOf()).apply {
                        // Serve sources to debug inside browser
                        add(project.projectDir.path)
                    }
                }
            }
        }
        binaries.executable()
    }
    /* ... */
}
The module name is wrong, and we don't want an executable binary. We also don't need to output a composeApp.js file. So replace the wasmjs block with:
    wasmJs {
        moduleName = "segmented-display"
        browser()
        binaries.library()
    }
Updating the JVM target name
It's atypical to produce a library with "desktop" in the name. When you look at the most popular multiplatform libraries with JVM support, their artifact IDs all end in -jvm, so we should do the same. Presently, however, we have defined our JVM target like this:
kotlin {
    /* ... */
    jvm("desktop")
    /* ... */
}
Just get rid of the "desktop" string. The default is "jvm":
kotlin {
    /* ... */
    jvm()
    /* ... */
}
If you were to perform a Gradle sync in Android Studio now (or run ./gradlew) now, though, you'd receive an error saying:
KotlinSourceSet with name 'desktopMain' not found.
This happens because renaming the target renamed the default source set. The use of assignment of val desktopMain by getting via the by delegate assumes that the source set will be called "desktopMain", but because we changed the name of the JVM target, the source set name was changed to "jvmMain". Since we don't need to add any JVM-specific dependencies for this project, and because we're not building a desktop application, we can just remove the references to desktopMain. Presently, we have:
sourceSets {
    val desktopMain by getting
    /* ... */
    desktopMain.dependencies {
        implementation(compose.desktop.currentOs)
    }
}
Just delete those four lines:
sourceSets {
    /* ... */
}
Updating the iOS targets
We actually want the outputs of our iOS libararies to be jars. However, presently, we have:
kotlin {
    /* ... */
    listOf(
        iosX64(),
        iosArm64(),
        iosSimulatorArm64()
    ).forEach { iosTarget ->
        iosTarget.binaries.framework {
            baseName = "ComposeApp"
            isStatic = true
        }
    }
    /* ... */
}
We can just remove the configuration that creates the iOS framework. Replace that block with the following:
iosArm64()
iosSimulatorArm64()
iosX64()
If you're not using a Mac, then you should just remove all iOS targets.
Removing unnecessary dependencies
While we can be a little more lax with dependencies at the application level, libraries that declare unnecessary dependencies can be cumbersome. This is NOT an application, and a lot of the dependencies that were added by the Kotlin Multiplatform template were in service of building an application--not a library. Presently, we have:
sourceSets {
    androidMain.dependencies {
        implementation(compose.preview)
        implementation(libs.androidx.activity.compose)
    }

    androidMain {
        this@androidMain.resources
    }
    commonMain.dependencies {
        implementation(compose.runtime)
        implementation(compose.foundation)
        implementation(compose.material)
        implementation(compose.ui)
        implementation(compose.components.resources)
        implementation(compose.components.uiToolingPreview)
    }
}
We can get rid of the majority of this:
sourceSets {
    commonMain.dependencies {
        implementation(compose.foundation)
        implementation(compose.ui)
    }
}
This change removes the dependencies that we do not need (and that we do not need to declare due to transitive dependency resolution)
Removing the compose.desktop block
Because we're not making an application, it also does not make sense to have the compose.desktop block. Presently, we have:
compose.desktop {
    application {
        mainClass = "MainKt"

        nativeDistributions {
            targetFormats(TargetFormat.Dmg, TargetFormat.Msi, TargetFormat.Deb)
            packageName = "com.fsryan.ui"
            packageVersion = "1.0.0"
        }
    }
}
You can safely delete this.
Summary of converting the application module into a library module
In this section, you hopefully gained some insights into the differences between an application module and a library module. You also were able to remove a bunch of code from segmented-display/build.gradle.kts. When we get to the article on deploying the library to Maven Central, we'll add more configuration.
Changing some Library Code
At this point, you've made your library module, but all the code is the same as it was before. In this section, lets make a composable function in the segmented-display library module and use that function in the composeApp module. Then lets test it out by running the composeApp application.
Removing all the old code
All the code you have copied over from the composeApp project is now useless to you. Your first step is to remove it.
Removing the Android code
Delete all files under segmented-display/src/androidMain/kotlin. You can run rm -rf segmented-display/src/androidMain/kotlin/* to do this. Then delete all the files in the res directory. You can run rm -rf segmented-display/src/androidMain/res/* to do this. Then update the Android manifest to be the following:
<?xml version="1.0" encoding="utf-8"?>
<manifest xmlns:android="http://schemas.android.com/apk/res/android">

    <application />

</manifest>
Why is this okay? Well . . . our library still needs a manifest. The Android Gradle plugin does what's called manifest merger. This allows android AARs to declare things like permissions, activities, broadcast recievers, content providers, and services in a manifest that eventually gets merged with the actual application manifest of the consuming application. We're not adding any of this, but an AndroidManifest.xml file is required, so we'll just have a basically empty manifest.
You can also go back to the android block of the segmented-display/build.gradle.kts file and add buildConfig = false to the buildFeatures block. This will prevent the Android Gradle Plugin from generating an unnecessary BuildConfig class.
Removing the rest of the old code
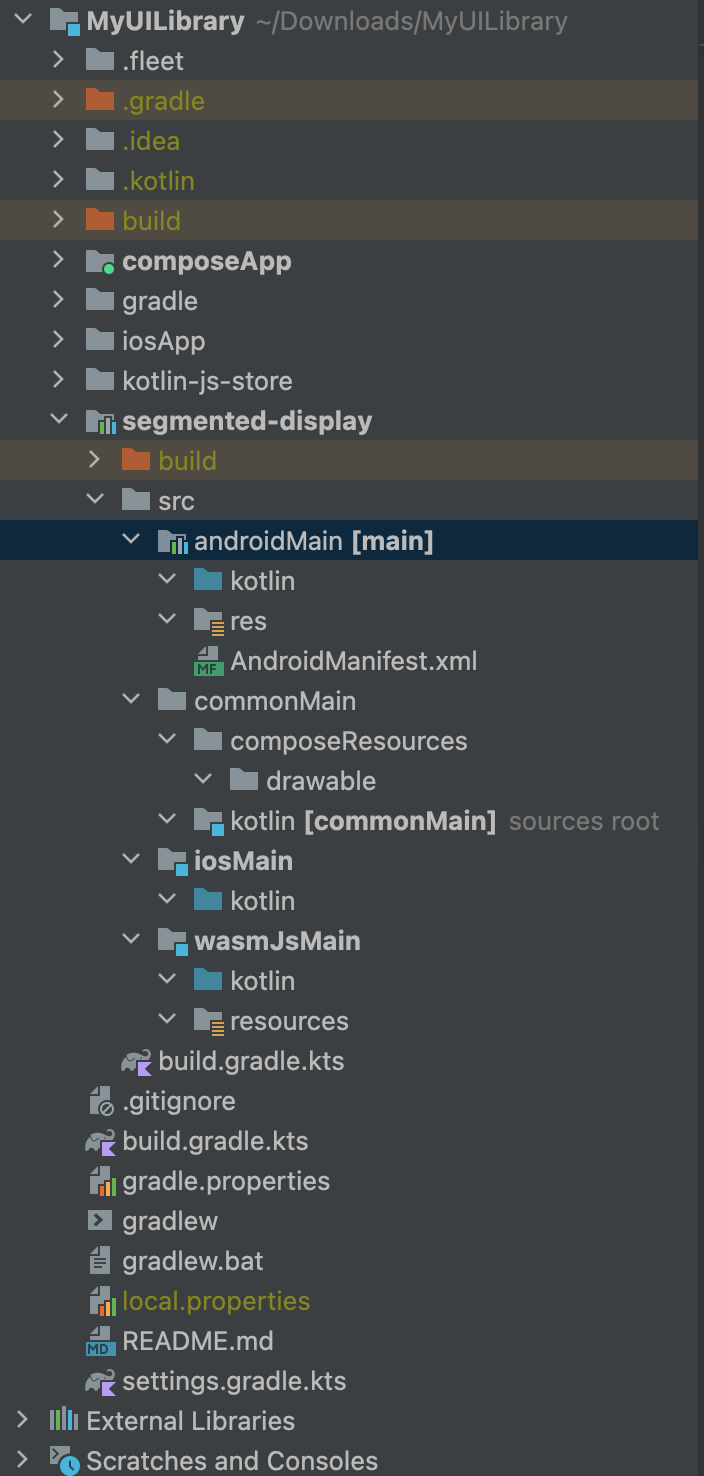
The rest is pretty straightforward. Just delete all files under the segmented-display/src/<source set>/* directories for each source set. You can also delete the desktopMain source set, because it's no longer providing anything.
After expanding all the directories under segmented-display, my project looks like this:
Add a sample Composable
Let's create a basic Composable function just to test that we can pull it in to the composeApp module. In the segmented-display/src/commonMain/kotlin directory, create a new file called com/fsryan/ui/SampleComposable.kt with the following contents:
package com.fsryan.ui

import androidx.compose.foundation.background
import androidx.compose.foundation.layout.Box
import androidx.compose.foundation.layout.fillMaxSize
import androidx.compose.runtime.Composable
import androidx.compose.ui.Alignment
import androidx.compose.ui.Modifier
import androidx.compose.ui.graphics.Color

@Composable
fun SampleComposable(color: Color) {
    Box(
        modifier = Modifier.fillMaxSize().background(color),
        contentAlignment = Alignment.Center
    ) {
    }
}
This will just show a maximum size box with the background color--perfect for our testing.
Making sure your project compiles
Run ./gradlew clean :segmented-display:compileKotlinJvm
If this fails, then you know you've messed up somewhere. That's okay. I can't anticipate all the problems that could come up, but pay attention to the error messages. At this point, if your project doesn't compile, though, it's possible that you may not have correctly decleared the dependencies in the segmented-display/build.gradle.kts file. The IDE should also show this by failing to resolve the imports.
Set the inter-project dependency in the composeApp module
In the composeApp/build.gradle.kts file find the commonMain.dependencies block. Presently, we have:
commonMain.dependencies {
    implementation(compose.runtime)
    implementation(compose.foundation)
    implementation(compose.material)
    implementation(compose.ui)
    implementation(compose.components.resources)
    implementation(compose.components.uiToolingPreview)
}
Add the following line to the commonMain.dependencies block:
implementation(project(":segmented-display"))
This enables the composeApp module to use the code you've written into the segmented-display module.
You DO NOT have to specify the dependency for each platform based upon configuration. The Kotlin Multiplatform plugin figures that part out for you.
Use the SampleComposable function in the composeApp module
If you look at composeApp/commonMain/kotlin/App.kt, you'll see the code that was provided for you by the template. Presently, we have:
import androidx.compose.animation.AnimatedVisibility
import androidx.compose.foundation.Image
import androidx.compose.foundation.layout.Column
import androidx.compose.foundation.layout.fillMaxWidth
import androidx.compose.material.Button
import androidx.compose.material.MaterialTheme
import androidx.compose.material.Text
import androidx.compose.runtime.*
import androidx.compose.ui.Alignment
import androidx.compose.ui.Modifier
import androidx.compose.ui.graphics.Color
import org.jetbrains.compose.resources.painterResource
import org.jetbrains.compose.ui.tooling.preview.Preview

import myuilibrary.composeapp.generated.resources.Res
import myuilibrary.composeapp.generated.resources.compose_multiplatform

@Composable
@Preview
fun App() {
    MaterialTheme {
        var showContent by remember { mutableStateOf(false) }
        Column(Modifier.fillMaxWidth(), horizontalAlignment = Alignment.CenterHorizontally) {
            Button(onClick = { showContent = !showContent }) {
                Text("Click me!")
            }
            AnimatedVisibility(showContent) {
                val greeting = remember { Greeting().greet() }
                Column(Modifier.fillMaxWidth(), horizontalAlignment = Alignment.CenterHorizontally) {
                    Image(painterResource(Res.drawable.compose_multiplatform), null)
                    Text("Compose: $greeting")
                }
            }
        }
    }
}
Instead of Image(painterResource(Res.drawable.compose_multiplatform), null), let's use the sample composable that we defined. Replace that line with:
SampleComposable(Color.Blue)
The IDE should soon prompt you that you have to import the sample composable. So you'll either need to use the IDE tool to automatically import it, or add the following import to the top of the file:
import com.fsryan.ui.SampleComposable
Showing the Sample Composable
Run the composeApp desktop application (./gradlew :composeApp:desktopRun -DmainClass=MainKt). You should see a screen with a button that says "Click me!" When you click the button, the screen should turn blue.
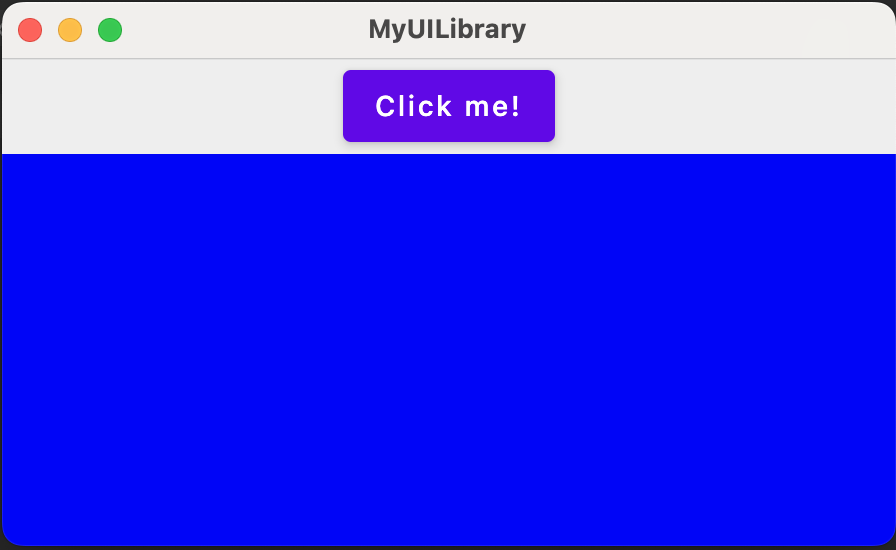
As we develop our library, we'll continue to use the composeApp module to test out the library manually. And when we're done, the composeApp module will serve as an integration guide for other developers who want to use our library.
Conclusion
Wow! That was quite a long article for setting up your project. However, it wasn't actually that much work. In this article we:
- Generated a Kotlin multiplatform application project that has Android, destop, iOS, and wasmJs targets
- Took a tour of the generated Gradle project.
- Added a new library module using the existing application module as a base
- Modified the new library module such that it will actually result in a library (instead of an application)
- Tested that we could write code in our library module and pull it in to our application module
At this point, we have now lain the foundation to build more interesting and useful composable functions. In the next article, we'll make a basic, no-frills, 7-segment display and show it in our composeApp.